Up to 86 percent of houses built before 1978 in the U.S. have at least some lead paint, according to the Environmental Protection Agency. Unless you're the original owner, however, knowing whether yours is one of them is a guessing game.
That's because not all paints used before the lead-based paint ban went into effect contained lead. What's more, a renovation or remodel by a previous owner might have removed walls, ceilings, or moldings that were finished with lead paint.
Lead paint test kits, sold at home centers and hardware stores, can alert you to the presence of lead and influence how you handle remodeling or painting projects. But you have to follow the instructions to a T to get valid results.
Who Tests the Test Kits?
Consumer Reports evaluated lead test kits in 2007. "We tested lead test kits when they first became popular in the market and found that they generally worked as promised—provided they were used correctly," says Mark Connelly, senior director of product testing for CR. "The good news is that since then, the EPA has also established lead test kit performance standards."
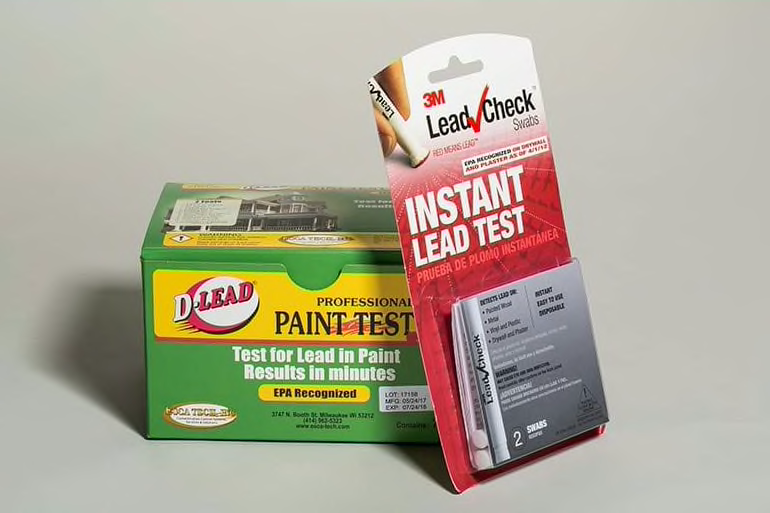
Indeed, the EPA recognizes just three lead test kits on the market. One is required by the state of Massachusetts (the Commonwealth of Massachusetts lead test kit) and is only available there. The other two are 3M LeadCheck and D-Lead, about $10 each for a two-pack, both of which are available at hardware and home-improvement stores. You can find more information on the EPA's website.
To gain EPA recognition, a lead paint test kit has to meet a clear criteria. At the EPA-regulated lead level for paint—equivalent to 0.5 percent of the paint's formulation, by weight—a kit must accurately produce a positive or negative result 95 percent of the time. "In other words, ‘EPA-recognized' is a really meaningful designation," says Michael Hansen, Ph.D., a senior scientist for Consumer Reports who has testified before government committees on a variety of environmental health hazards, including lead.
If you want even more reassurance than 95 percent accuracy against a false positive, you can test the same area twice. Doing so lowers the chance of a false positive from 1 in 20 to 1 in 400, provided both trials are conducted properly and return the same result.
Toxic Danger
Nobody is immune to the dangers of lead. But it's particularly dangerous to children because their developing brains and nervous systems are more vulnerable to the damaging effects of the toxic metal. And they're more likely to be exposed to it from playing or crawling on the floor, where toxic dust settles with the sanding of lead paint.
Both 3M LeadCheck and D-Lead can be used to detect lead on wood, plaster, and drywall; the Commonwealth of Massachusetts lead test kit is only for plaster and drywall. Below are the steps EPA-licensed lead paint inspectors follow to ensure an accurate result.
Step 1: Expose the Paint
Clean the surface you want to test following the directions on the test kit package. Use a utility knife to cut into the wood or wall. If you're testing a spot that's smooth and has only a coat or two of paint, you can make the cut head-on.
For surfaces with multiple paint layers, like old window casings or wall moldings, hold the utility knife at a 45-degree angle when making the cut to get a cross-section of every layer. For drywall or plaster, cut a semicircle in the wall about the diameter of a nickel with the knife at an angle, deep enough to reach the underlying plaster or gypsum.
Pry back the resulting flap of paint or plaster. Don't worry about damaging the wall. Even with a positive result, you can safely patch the spot with joint compound to smooth it out after the test.
Step 2: Test the Surface
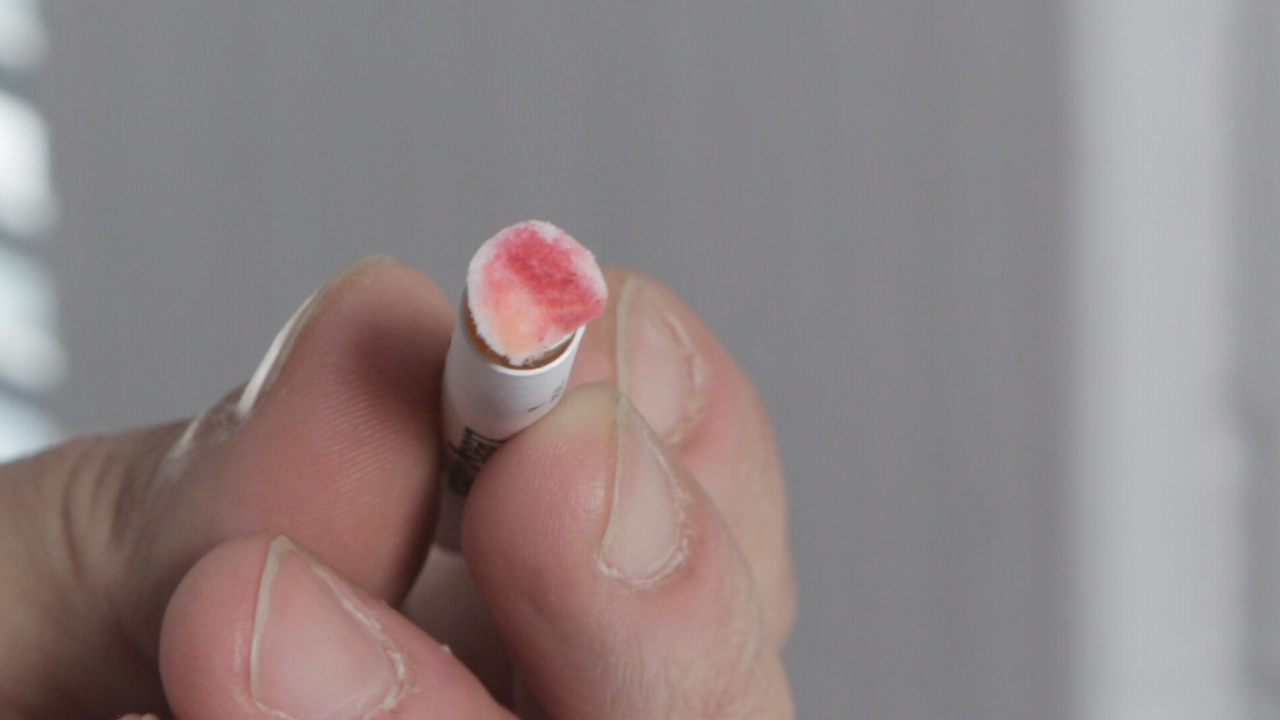
For the video above, we used 3M LeadCheck. First you squeeze the cardboard sleeve on the applicator in two spots to burst separate chemical capsules inside. The chemicals mix and remain active for 90 seconds. Shake the applicator to mix the chemicals and gently squeeze the center of the cardboard sleeve until a bead of brownish-yellow liquid forms at the tip.
Apply the applicator to the spot to be tested, making sure to rub it against all of the exposed paint layers. Continue to rub the applicator while squeezing gently for 30 seconds. If the tip turns pink or red, you have lead; if it remains unchanged, no lead has been detected.
To verify your results after a negative test, there's a lead-control card included in the kit. Drop a bead of the test liquid onto the card, and if it turns red, you know the applicator is working.
Step 3: Interpret the Results
If the test turns up a positive result for lead, that rules out sanding, scraping, or demolition without first having an abatement by an EPA-licensed lead paint remediator. The good news is that if all you want to do is patch or paint over the contaminated surface, you can safely do that—provided you don't do anything to disturb the lead paint. (That means no sanding, not even a little bit.) In fact, the EPA considers encapsulation—covering lead paint with another layer of paint—a safe remediation.
If the test is negative, it's smart to do additional tests over the entire area on which you'll be working to confirm the absence of lead.
"If you have any doubts at all, call in a pro," Hansen says. That means looking for a contractor or testing professional with a lead-safe certification from the EPA. The agency maintains a database of approved pros by state to make your search easier.